Why Does Garlic Need to Be Cured? (How to Cure It)
After harvesting, garlic isn't just ready to use; it undergoes a curing process, which is essentially a drying phase to ensure the bulbs store well over time. Curing garlic properly ensures that the bulbs are preserved at their best quality. This secret lies in allowing the garlic to slowly grow and develop its unique flavor profile, ensuring that it can be stored for long periods without losing its essence.
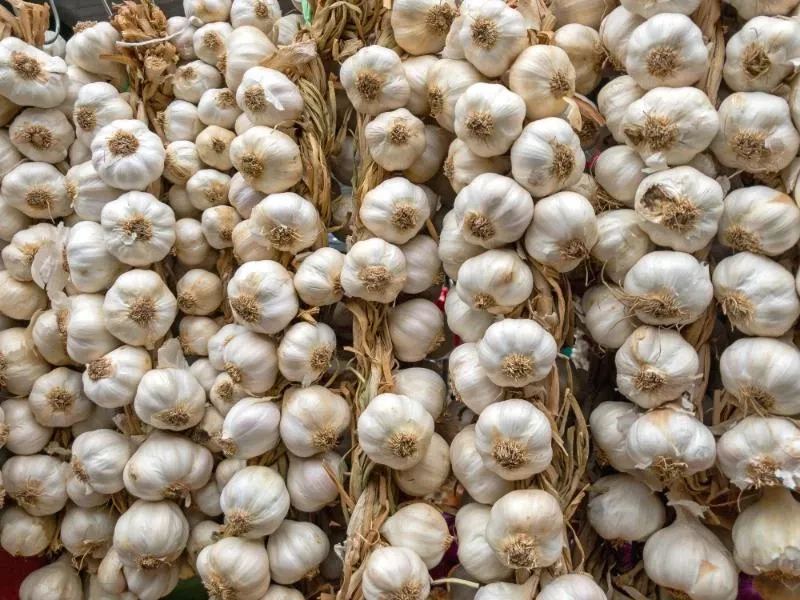
Garlic needs to be cured to reduce its moisture content, which enhances its flavor, preserves its quality, and extends its shelf life. To cure garlic, hang or lay it in a dry, well-ventilated area for 3–4 weeks until the outer skin is papery.
If you skip curing, what will happen to your garlic? Will it last through the winter?
Summary
- If you're hoping to keep garlic for a while, curing is crucial. Without it, garlic may rot or sprout prematurely, which curing prevents by removing excess moisture.
- Typically, curing takes about two weeks, but it can vary based on humidity and temperature. Garlic is sufficiently cured when the outer skin is dry and papery.
- You can use garlic fresh from the garden, but it will be very moist and potent. To mellow the flavor and store it, you should go through the curing process.
On this page:
Why Cure Garlic
When you harvest garlic, the bulbs contain a lot of moisture. This moisture could lead to mold or spoilage if not properly managed. Curing garlic helps in slowly removing this excess moisture without damaging the cloves. The ideal result is a dry outer skin and firmer cloves that are less prone to rot.
It may surprise you to learn that freshly harvested garlic can be too potent or even slightly bitter. The art of curing transforms fresh garlic into a pantry staple, ensuring that the robust flavors and aromas are preserved, ready to elevate your culinary creations with a depth of taste that's both robust and nuanced.
Curing garlic is a simple yet crucial step for anyone looking to store their garlic harvest for an extended period. After harvesting, garlic bulbs need to dry out in a place with good air circulation and some shade to protect them from direct sunlight.
How long to cure garlic
Garlic typically needs to be cured for about 3 to 4 weeks. During this time, the outer layers of the bulb dry out and become papery, and the flavors within the cloves mature and mellow. The exact time required for curing can depend on several factors, including the size of the bulbs, the humidity and temperature of the curing environment, and the garlic variety.
To ensure proper curing, check the garlic periodically:
- The necks should feel completely dry and be somewhat shrunken when the garlic is fully cured.
- The roots should be dry and brittle.
- The outer skins should be dry and papery, and the cloves should be firm to the touch.
This process, which usually takes a few weeks, allows the outer layers to become dry and papery, effectively sealing the moisture in the cloves and extending their shelf life. Through curing, the garlic's flavors also mature, resulting in a more robust taste when used in cooking.
Preparation for curing garlic
Before you cure your garlic, it's important to know the best time to harvest, and how to set up your curing space properly.
Things you'll need:
- Spade or garden fork
- Scissors or pruning shears
- A dry, airy space
Harvest garlic at the right time
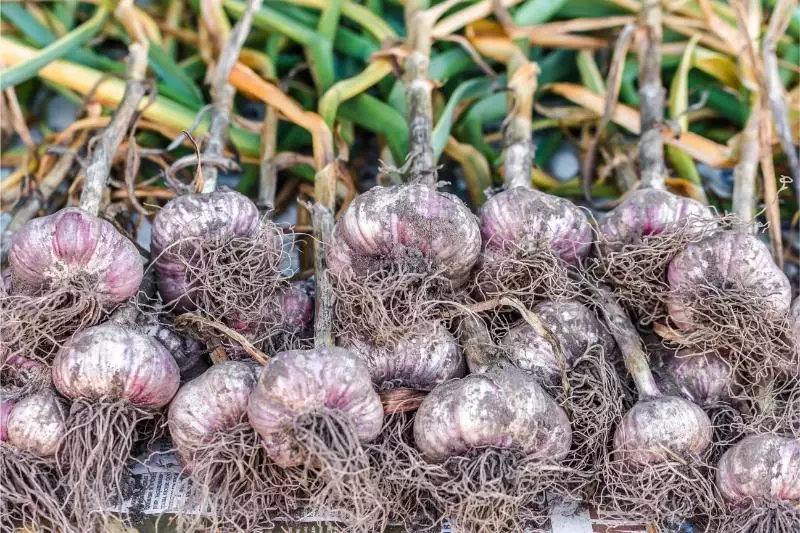
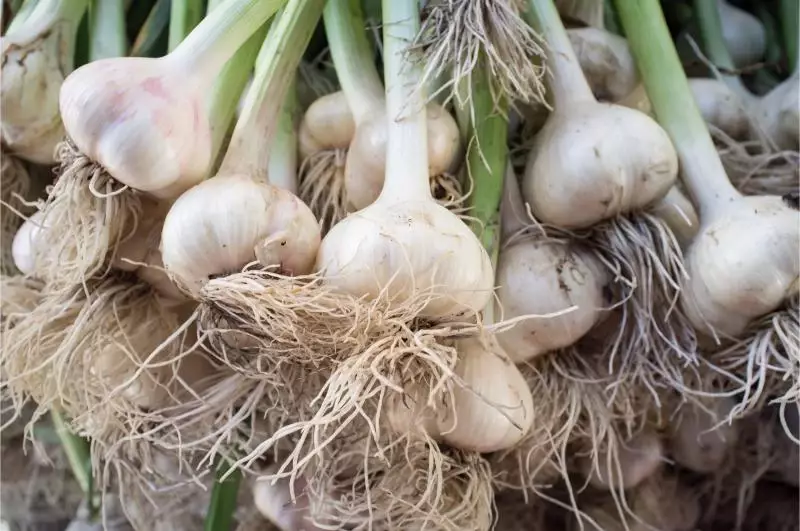
You want to look for signs that it's ready, such as when several lower leaves have turned yellow but five or six upper leaves are still green. Generally, this happens in late spring to early summer. Carefully loosen the soil with a fork and gently pull the bulbs out, making sure not to bruise them, as this can affect their quality.
How long does garlic take to grow and when is the best time to harvest? Find out in this article.
Once harvested, be delicate with your garlic bulbs. Avoid bruising them, as damaged bulbs don't store well. Use scissors to trim the roots to about 1/4 inch long, which helps to prevent the bulbs from absorbing excess moisture. Gently brush off any dry soil from the bulbs, but don't wash them, as water can promote mold during the curing process.
Prepare the space for curing
Choose a shady, well-ventilated area to cure your garlic because direct sunlight can change the flavor of the bulbs. A spot such as a covered porch or a shed works well.
Make sure that the space is ready before you begin harvesting, since garlic should start curing as soon as possible after being pulled from the ground. Set up racks or hooks to allow the garlic to hang, or lay out trays to place them on. Good air circulation is crucial, so consider adding a fan to the area if there isn't a natural breeze.
How to Cure Garlic
-
Find a well-ventilated, shaded, and dry area to hang or lay out your garlic.
-
You'll want to hang your garlic or spread it out in a single layer in a well-ventilated area. If you're hanging garlic, tie the stalks together and hang them up; for laying flat, use racks or screens.
-
Ensure that all sides of the garlic are exposed to the air—this helps prevent any moisture from being trapped, which could lead to rot.
-
Maintain the ideal humidity for curing garlic which is between 45 and 55%. This helps preserve the garlic without drying it out too quickly. As for temperature, aim to keep your curing space at a consistent 60-65 degrees Fahrenheit.
-
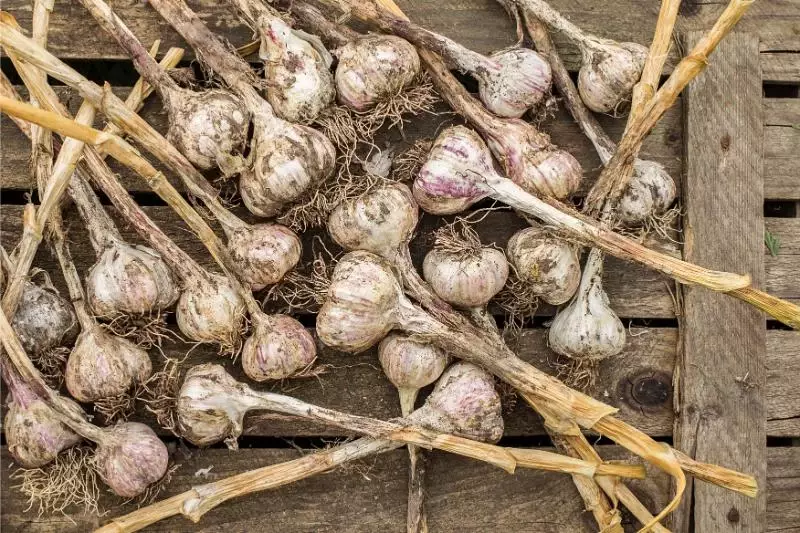
Allow the garlic to cure, generally for several weeks. During this time, the outer skins will become papery, and the stalks (or scapes if you have hardneck garlic) will dry out.
Avoid moving the garlic during this time, as movement could bruise the bulbs. Remember, you don't need to rush. Patience is key during the garlic curing process.
Once curing is complete, trim off the scapes and roots, and gently clean the outer skins without removing them. Now your garlic is ready for use in your kitchen or as seed for planting the next season.
How to cure hardneck garlic
Curing hardneck garlic is a process that allows the garlic to dry so that it can be stored for a longer period. Here's how to properly cure hardneck garlic:
-
Harvesting: The right time to harvest hardneck garlic is when several of the lower leaves turn brown, but there are still a few green leaves left on the plant. This usually occurs in late summer. To harvest, gently dig around the bulbs to loosen the soil and pull the plants up. Avoid damaging the garlic bulbs with tools.
-
Cleaning: Gently brush off any loose soil from the bulbs. Avoid washing them, as excess moisture can encourage mold growth during the curing process.
-
Drying: Find a dry, well-ventilated area out of direct sunlight to cure your garlic. This could be a shed, garage, or covered porch. Lay the garlic out or hang it in bunches. If you're hanging the garlic, you can tie the stalks together with twine.
-
Curing time: Allow the garlic to cure for about 3 to 4 weeks. During this time, the outer skin will become papery, the roots will dry out, and the flavors will mellow and concentrate.
-
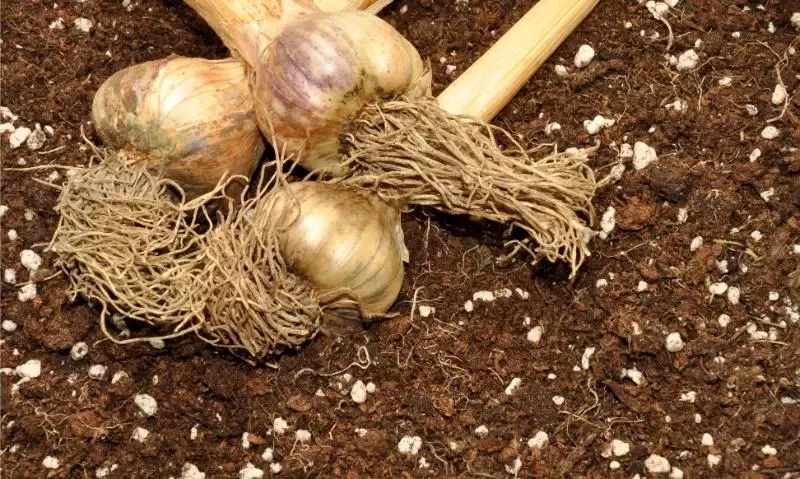
Trimming: Once the garlic is fully cured, trim the roots close to the bulb and cut the stalks off about 1 to 2 inches above the bulb if you prefer. Be sure to leave enough of the neck to keep the cloves enclosed in their wrappers.
-
Storage: Store the cured garlic in a cool, dry place with good air circulation. A mesh bag, basket, or even a paper bag can work well for storage. Avoid storing garlic in plastic bags or containers, which can retain moisture and cause the bulbs to rot. The ideal storage temperature is around 60-65°F (15-18°C) with moderate humidity.
-
Monitor: Check your stored garlic regularly for any signs of softness or mold. Use any bulbs that are starting to go bad first to minimize waste.
Curing hardneck vs softneck garlic
Curing softneck garlic is similar to curing hardneck varieties, but there are some differences in handling and potential storage methods due to the physical characteristics of softneck garlic. Softneck garlic is often preferred for braiding and tends to have a longer shelf life than hardneck garlic.
Stalks
- Hardneck garlic: Has a stiff, hard central stalk that does not lend itself to braiding. The stalks are typically cut after curing.
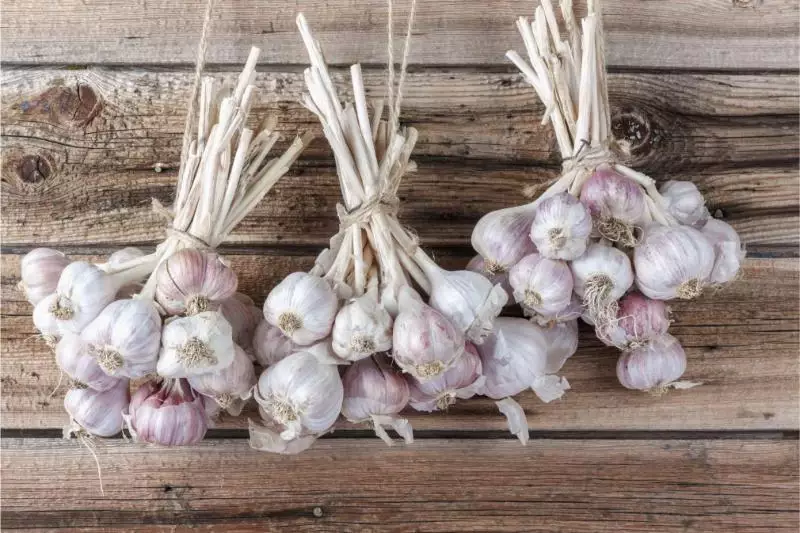
- Softneck garlic: Has flexible, soft stalks that can be braided for storage. Braiding is often done after the initial drying and before the garlic is fully cured.
Bulb size and skin
- Hardneck garlic: Generally has larger cloves and a looser skin that can be easier to peel. The skins are thinner, which can reduce their storage life compared to softneck varieties.
- Softneck garlic: Usually has smaller, more numerous cloves and tighter skin, which often makes them longer-lasting in storage.
Curing process
- Hardneck garlic: Typically laid out to dry or hung in bunches. The hard stalks can make it difficult to hang without some support.
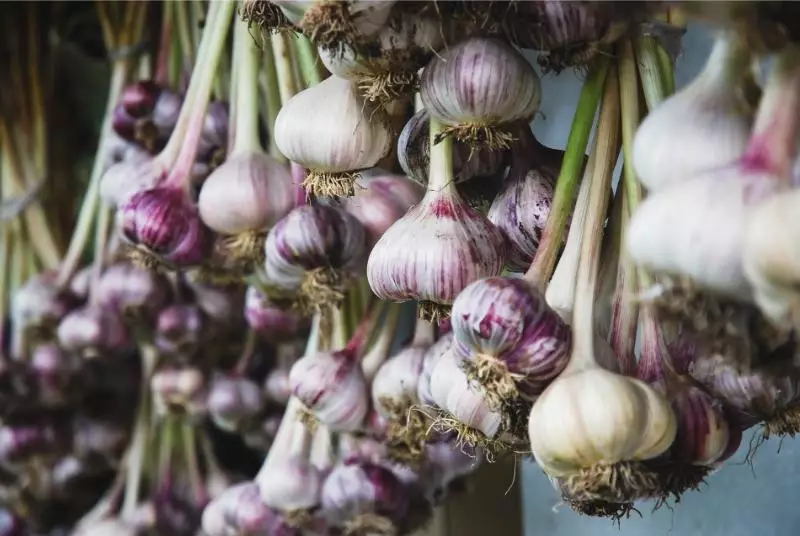
- Softneck garlic: Can be laid out to dry, hung in bunches, or artfully braided and then hung. The braiding not only serves a practical purpose for hanging and storing, but also is aesthetically pleasing.
Storage life
- Hardneck garlic: Often has a shorter storage life of about 4–6 months due to its looser skin and larger cloves.
- Softneck garlic: Can have a longer storage life, sometimes up to a year, because of its tighter skin and denser bulb structure.
Curing location
Both types should be cured in a dry, well-ventilated area away from direct sunlight. However, because softneck garlic is more pliable and often braided, it can be hung decoratively in the kitchen or another area of the home as long as the environment is suitable.
Post-Curing Handling
Once garlic has completed the curing process, it's important to know how to properly clean and store your harvest. Proper post-curing handling ensures your garlic stays fresh for as long as possible by reducing the risk of spoilage from external factors like excess moisture and inappropriate temperatures.
Cleaning and trimming the cured garlic
After the garlic bulbs are cured, gently brush off any remaining dirt, but be careful not to strip off the papery outer layers as they protect the cloves. Clip the roots close to the bulb and trim the stalks to about 1 inch if you have hardneck garlic, or leave a few inches if you plan to braid softneck garlic.
For elephant garlic, which is larger, use a soft brush to avoid damaging the cloves.
Have you heard about why seed garlic is so expensive? Read this article to know more.
Storing cured garlic correctly
- Temperature: Store garlic in a cool, dry place with temperatures around 60-65°F (15-18°C).
- Humidity: Keep it low, ideally between 40-60%.
- Ventilation: Provide good airflow to avoid any moisture buildup.
You can store your garlic in mesh bags or baskets, which allows for adequate air circulation. Avoid storing garlic in the fridge, as it can sprout due to the humidity and temperature.
Expect a shelf life of several months; however, bulb size and the variety, such as elephant garlic, may affect the long-term storage potential. Remember to check the bulbs periodically and remove any that show signs of spoilage.
Garlic Curing Problems
Garlic that has not been cured well may not keep for long and might develop mold. If kept in warm and humid conditions, bulbs may become soft and spoiled.
-
Overexposure to moisture and rain: When you're curing garlic, make sure it's in a covered, dry area away from rain. A bit of dampness is garlic's enemy, potentially leading to mold growth and soft, moldy cloves that are unfit for storage or consumption.
-
Mold and rot in cured garlic: Ensure good air circulation around each bulb to avoid mold or rot. Hang garlic in bunches or spread them on racks in a well-ventilated space. If signs of mold appear, immediate action can save the rest from spoiling.
-
Bruising and physical damage: Handle your garlic with care to prevent bruises that can lead to decay. Be gentle when removing soil—don't wash the bulbs—and store them in a manner that avoids the bulbs being crushed or damaged. Remember, a bruised bulb often means a lost bulb.
Tips and Tricks for Better Curing
Start by selecting a dry, shaded spot to avoid direct sunlight, which can cause damage to the bulbs.
If you skip curing, your garlic might not last through the winter, and its taste could be less potent.
Good air circulation
Ensure ventilation is adequate wherever you choose to cure your garlic. Use a fan or ensure a natural breeze can pass through the curing area. Hang garlic or lay it out on a wicker or mesh surface to promote air flow around each bulb.
Braiding and twine
For softneck varieties, consider braiding your garlic with twine. This traditional method not only saves space but also assists in even drying. Hang the braids away from damp areas to prevent mold.
Handling techniques
Handle your garlic with care to avoid bruising. When the outer layers are papery and the roots feel brittle, your garlic is ready for storage.
Summer harvest
If you harvest in the summer, be mindful that high humidity can affect curing. Choose the driest part of your space.

How much garlic can you harvest per acre? Find out the average garlic yield here.
Using Cured Garlic
Once your garlic is cured, it opens up a world of possibilities for cooking, preserving, and even enhancing your gardening practices. Cured garlic has a milder, more mellow flavor compared to its freshly harvested counterpart, making it a versatile ingredient in the kitchen.
Culinary applications for cured garlic
You can use whole bulbs in roasts or stews, where they'll infuse your meal with a subtle garlic essence. If you're into homemade spices, consider making garlic powder by dehydrating peeled cloves and grinding them into a fine dust. This powder serves as a quick flavoring agent for any dish, handy for when you're short on time.
How long does cured garlic last
If stored properly in a cool, dry place with good air circulation, cured garlic can last up to several months. This longevity makes it a reliable staple for your culinary needs. Here's a quick reference to check its shelf-life:
Optimal storage conditions:
- Temperature: Just above freezing to 70°F (21°C)
- Humidity: 60-70%
- Environment: Dark, well-ventilated area
Freezing is an option; whole bulbs or individual cloves can be frozen, preserving their quality. If you prefer, you can pickle your cloves, merging the distinct garlic taste with a tangy brine. This method enhances flavors and ensures your garlic lasts even longer.
Pickling and canning are great ways to avoid waste and keep your garlic cloves ready for future culinary endeavors.
Using cured garlic in the home garden
Plant cloves of the best quality with no signs of sunburn or sprout to raise your next crop. Look for those with purple stripes, as they often indicate a hardy variety. As for garlic sprouts, they can also be planted or used in cooking for a milder taste.