How To Inspect a Beehive (How Often, How Long & When)
Honeybees are strong and independent, but they need a little love too! Here's how to do hive inspections with minimal interruption to your little workers.
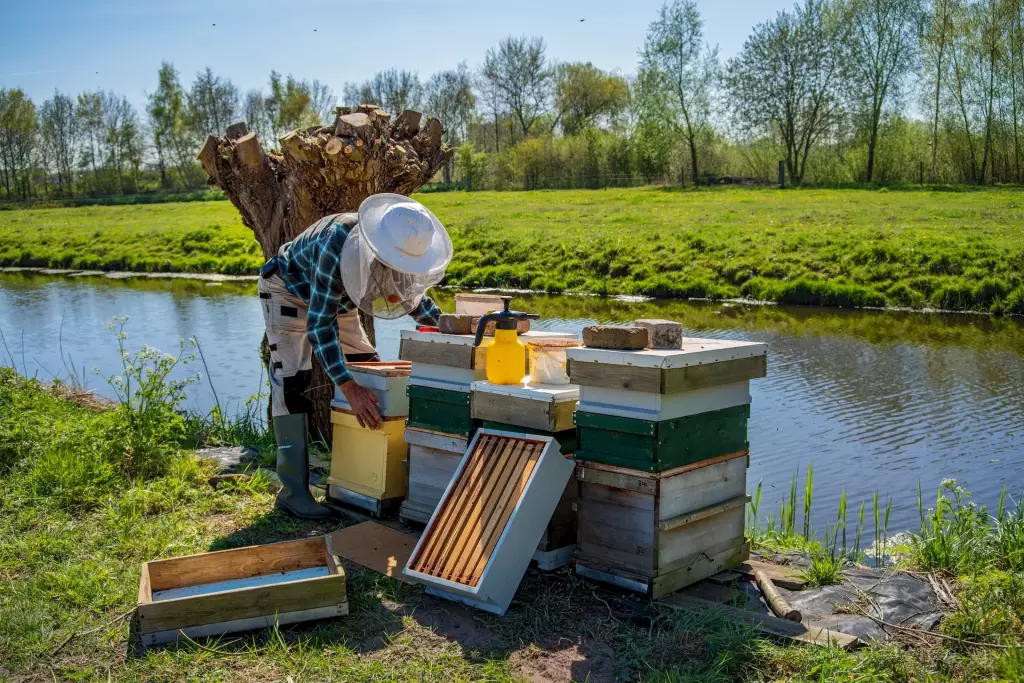
Start by removing the covers and setting them upside down, one atop another, on the ground. Begin inspection on the bottom deep box before moving to the second deep box. Gear up and have your tools ready so you can work quickly.
Inspection is a slow, steady, and methodical process. You need to have a careful grip and a quick eye for spotting any anomalies in the hive. So suit up and get ready with this guide on beehive inspections!
Summary
- Make sure you are methodical and organized. Disassemble and reassemble the hive box in the same order so you don't disrupt the colony.
- Put on your beekeeping gear and have your tools close by.
- Wait for warm, sunny days, and conduct your inspections in the morning or afternoon.
- New hives should be inspected every week, but established colonies can go three to four weeks between inspections.
On this page:
How to Inspect and Assess a Beehive
Prepare Your Equipment
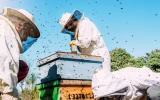
Put on your beekeeping gear, making sure that you are not wearing any loose clothing that could impede movement underneath. Keep your smoker, hive tool, and a notepad within arm's reach in case you need to take notes or help calm the bees down.
Required equipment:
- suit
- smoker
- hive tool
- notepad
Open the Hive
Before anything else, use the smoker to calm the guard bees at the entrance in front of the hive. Gently lift the outer cover and direct some more smoke into the hive before closing it again. Give the smoke a few minutes to fully take effect.
Disassemble the Hive
Remove the Outer Cover
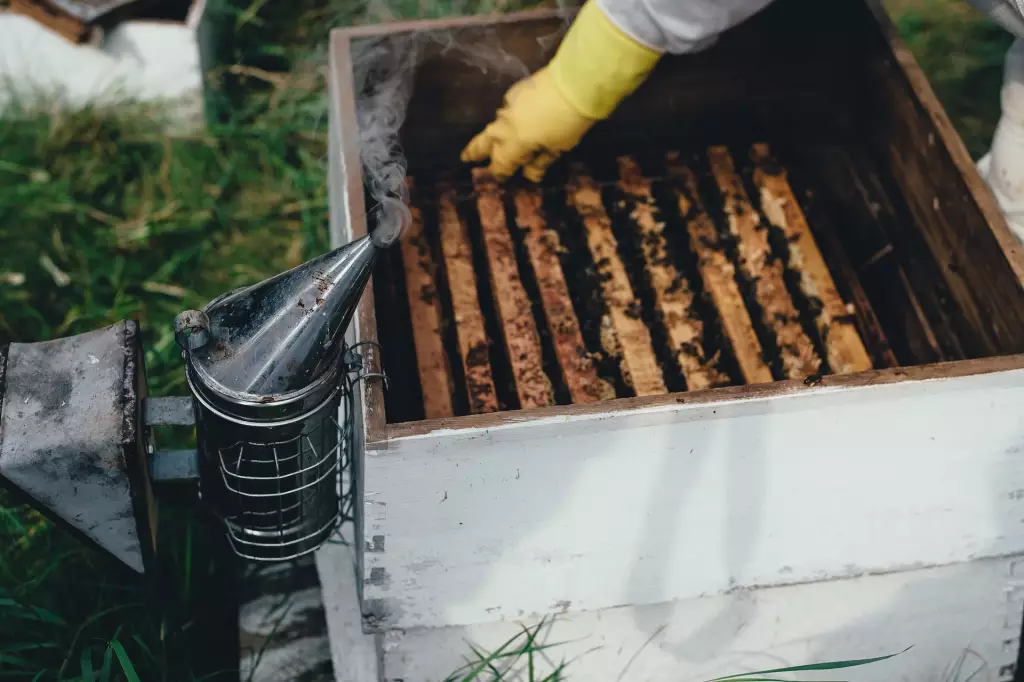
Take off the outer cover and set it aside. Pour in some more smoke into the hole of the inner cover and wait two more minutes for the bees to react.
Remove the Inner Cover
Grab your hive tool and start prying up the inner cover. It may have some wax and propolis, so scrape it off gently to help with the process. Once you've lifted it up successfully, lay it down on top of the outer cover on the ground, moving gently so that you do not injure any bees.
Remove the Honey Super
With your hive tool, start working on the top box or the honey super. Set it down on top of the inner cover. If you have a younger colony, you may not yet have this box yet, so just proceed to the next parts of the hive.
Smoke the Second Deep Box
The second deep box is usually one of two boxes that house the brood colony. Remove it and place it on top of the honey super or inner cover. Inspections need to start with the bottom box, so you'll get back to this later.
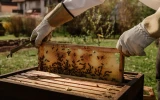
Remove the First Frame
This is where your inspection begins! Smoke the frames for two minutes, and then remove it so you can take a closer look. You can use a frame holder to get a closer look or just place it on top of the other hive boxes, still being mindful that you move carefully and avoid hurting any bees.
Inspect the Frames
Use the hive tool to pry open each frame and inspect its contents. Here's a checklist of what you need to look for:
- The hive queen or her eggs. If she isn't marked, look for a bee with a long, slender, and unstriped abdomen who is surrounded by a circle of workers. If you can't spot her, look for eggs instead; this shows that the queen was working in the hive for the past one to three days.
- Parasites or pests. Look for varroa mites, wax moth larvae, or foulbrood.
- The number of frames that are "drawn out," or ready for honey. If there are seven out of ten frames ready in the first frame, then it's time to add a second deep box. If the second deep box has seven out of ten drawn frames as well, then it's time to add a honey super. And if the honey super is almost full, then you'll need to add another one.
Look for Eggs
Grab each frame firmly with two hands and tilt it up toward the sky at a slight angle, with the sun shining over your shoulder. Eggs look like thin grains of rice that have been laid in the center of each cell. If you are new to beekeeping, then this is the most important part of the inspection because it shows that the queen has acclimatized to the hive and the worker bees, in turn, have accepted her.
You can use reading glasses or a magnifying class to help look. Tilting the frame to the side of you also helps, so that the mesh on your veil does not interfere with your hunt for the eggs.
In case you see more than one egg per cell, or multiple "grains of rice," then you need to consult an experienced beekeeper. This happens when the worker bees in the hive have started laying eggs, which means that their queen has been compromised.
Gently tilt the frame back and forth, experimenting with different angles until you can see the eggs.
Reassemble the Hive
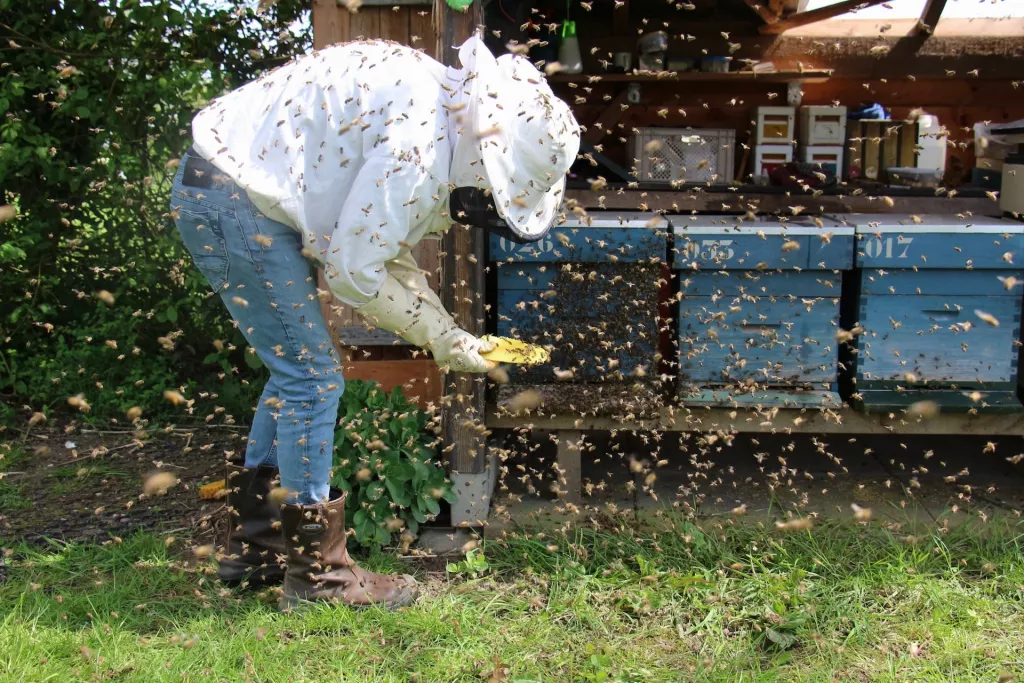
Throughout the inspection, use a bee brush or the smoker to guide bees out of the way so that they don't get pinched as you work through the frames. Make sure to put each frame you want to inspect into the open space left by the previous one you removed.
Preserve the arrangement of the hive. Do not change their order during inspection. Once you are finished looking at all the frames, push the entire set together and use the hive tool to clear a little room for the first frame. When you put it back, even up the space on the sides of the first and last frames so that they remain centered in the box.
Restack the second deep box onto the first deep box, and then bring back the honey super. Do this by carefully positioning it on the back edge of the hive and slowly inching it forward. Keep an eye out for any bees that might get pinched along the way, and use your smoker or bee brush to move them aside. Do the same for the inner cover and the outer cover.
Take Notes Immediately
Don't delay! It's easy to forget your observations, so keep your notebook or journal close by so that you can get straight to recording how your inspection went. Describe whether the queen was in good condition, what the brood frames looked like, and whether you identified any pests and diseases.
Set Aside Your Equipment
Remove your suit. Make sure it's laundered before you use it again, to remove any traces of bee venom that may alert the guards in the future. You also need to place your smoker somewhere it can burn out safely. `
Frequently Asked Questions
How often should I inspect my beehive?
During the spring and the summer, it's best to conduct inspections every seven to ten days, especially for new hives. This is because new hives grow at a faster pace and you may need to invest in new hive boxes, as a preventative measure against swarming.
In the winter, check the hive at least once a month. Make sure you don't linger, as the bees may suffer from the cold.
Weaker colonies may also need more frequent inspections as you monitor their recovery. Meanwhile, strong and established colonies can go as long as three to four weeks between inspections.
How long should a hive inspection take?
Inspections usually take anywhere between 30 and 60 minutes per hive.
As you become more experienced, inspections may take less time and seem less daunting. You'll get a trained eye for spotting the queen, checking for drawn comb, and spotting parasites.
How long after a swarm should I check the hive?
Give your new colony at least seven days before you go back to check on them. Look for signs of a queen or eggs.
Swarming refers to how a colony that is too crowded eventually splits into two groups or more. In this case, beekeepers need to act fast and secure the swarm in a separate hive.
How do you inspect a hive for the first time?
Come prepared
Wear protective equipment, have your tools ready, and make sure you can move gently and with ease. f the bees seem agitated, blow a small amount of smoke across the frames, but not directly into the hive.
Put everything back in place
When you're taking apart the hive, make sure that all the frames are stacked upside down and to the side so that it is easier to remember their order. Use your hive tool to carefully pry each frame off and then center them as you reassemble the hive after inspection.
Inspect the hive while the bees are out
Wait for when the bees are out! When there are less bees around the beehive, you are less likely to accidentally pinch them while moving the hive parts, or to encounter defensive bees in case your inspection falls on a bad bee day. Comb inspections are also faster because there are fewer bees on the frame.
Wait for warmer days
Bright and sunny days are the best times to conduct inspections. Go in the morning or the afternoon, timing your visit to correspond to when bees are out foraging for nextar and pollen.
What is the lowest temperature to open a beehive?
Try conducting inspections on days when the temperature is between 60 and 100 F° (15 and 38 C°). Bees cannot fly when the temperature drops lower than 50 F° (10 C°), and they don't fly out when it goes above 100 F° (38 C°).
If you do need to conduct an inspection (and it is recommended that you look at your hives at least once a month in the winter,) make sure that you work quickly and avoid pulling out the frames. Just pull the boxes apart, conduct a little supplemental feeding if needed, and look at the cluster to make sure they're healthy.