How to Harvest and Cure Garlic the Right Way
Garlic undergoes a meticulous process of harvesting and curing that ensures its pungent flavors and medicinal properties are preserved. Harvesting at the right time is crucial; and the subsequent curing phase, involving drying the bulbs in a well-ventilated, shady area, is essential for extending their shelf life and enhancing their flavor. This article will delve into the comprehensive steps involved in harvesting and curing garlic effectively, ensuring the longevity and quality of the bulbs.
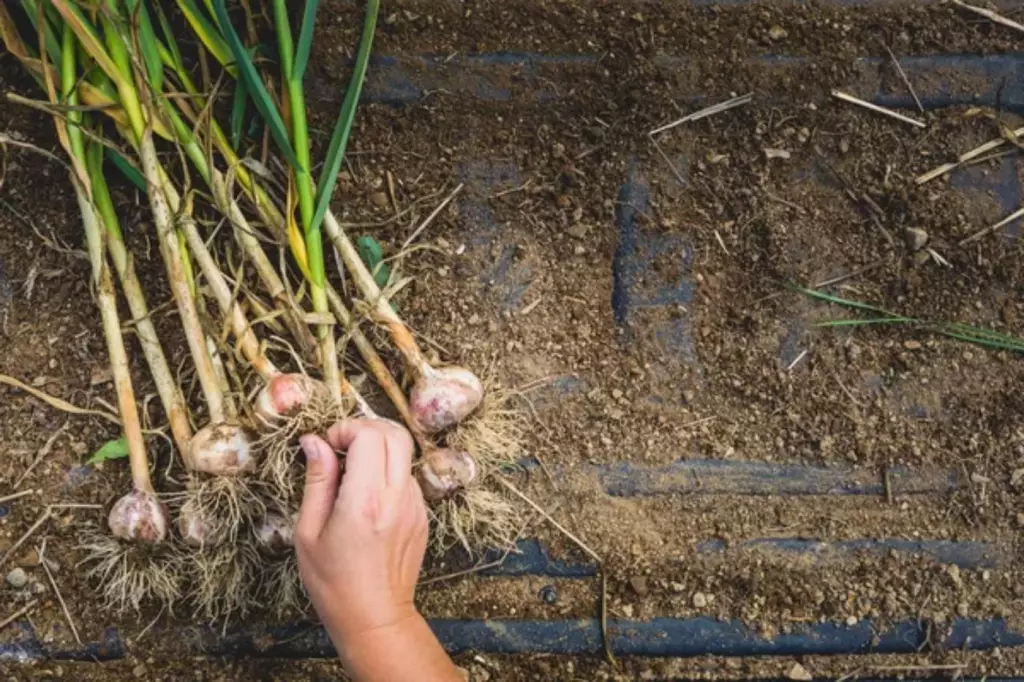
To harvest garlic, wait until the lower leaves turn brown, but the upper leaves remain green. Carefully dig them out, avoiding damage. For curing, hang or spread the bulbs in a dry, well-ventilated area for 3–4 weeks. Trim roots, cut stems, and store in a cool, dry place.
When it comes to harvest time, you might think the hard work is all done, but here's where many stumble: common mistakes that can turn your bounty into a bust. Let's find out some of the common mistakes most gardeners commit when it comes to harvesting garlic.
Summary
- Identifying the optimal garlic harvesting time is crucial, marked by specific signs in the plant's physical appearance, such as the browning of lower leaves and the retention of green upper leaves in hardneck varieties.
- Harvesting garlic necessitates cautious handling and the use of tools like garden forks or spades to loosen soil and lift bulbs gently to avoid damage, as bruised or damaged bulbs are more prone to disease and decay, compromising harvest quality and durability.
- After harvest, it's recommended to gently brush off loose soil instead of washing garlic bulbs with water and to cure them in a dry, well-ventilated area to prevent rot.
On this page:
Step-by-Step Guide to Harvesting Garlic the Right Way
| Step | Action | Tips & Considerations |
|---|---|---|
| Timing | Stop watering | Cease watering a week before the expected harvest to allow bulbs to firm up. |
| Soil check | Loosen the soil around bulbs | Use a garden fork or spade to gently loosen the soil without directly digging up the bulbs. This prevents damage to the garlic. |
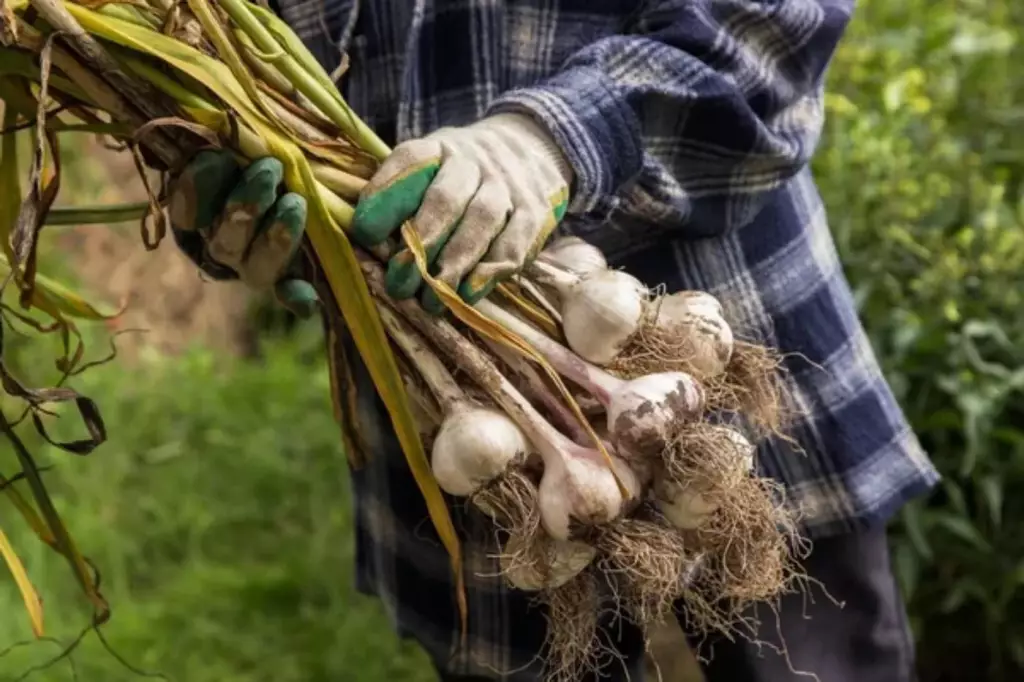
| Bulb removal | Lift bulbs from the soil | Gently pull the stalks upward. If resistance is met, further loosen the soil with the fork until the bulb can be lifted out without causing damage. |
| Handling | Careful handling post-harvest | Handle the harvested bulbs with care to avoid bruising. Damaged bulbs are more susceptible to disease and decay. |
Pre-harvest preparation
Before diving into the actual harvesting of garlic, you need to prepare thoroughly to ensure a successful yield. Proper timing and the right tools will set the stage for an optimal harvest.
Recognizing the right time to harvest garlic
Timing is everything when it comes to harvesting garlic. Your hardneck garlic typically shows it's ready when the lower leaves turn brown, and about half the leaves remain green, usually in early to mid-summer.
Softneck garlic varieties might fall over, indicating maturity, which can be a bit later in the season. Both types benefit from fall planting and should have experienced solid growth in well-draining soil and full sun.
Tools and materials needed for harvesting
The right tools make a difference. At the minimum, you'll need a:
- Garden fork or a spade: These help you loosen the soil around the bulbs without cutting through them.
- Shovel: For beds with heavier soil, it's helpful for initial soil loosening.
- Gloves: To protect your hands during the process.
Ensure your tools are clean to prevent the spread of disease and gather all your materials before getting started to make the process smooth and efficient. Take a look at the costs of harvesting gear and other garlic farming tools in this article.
The harvesting process for garlic
To ensure a successful harvest of your garlic crop, it's essential to recognize the signs of maturity and follow a precise harvesting routine. Avoiding common mistakes will help you retrieve the most flavorful and long-lasting garlic bulbs.
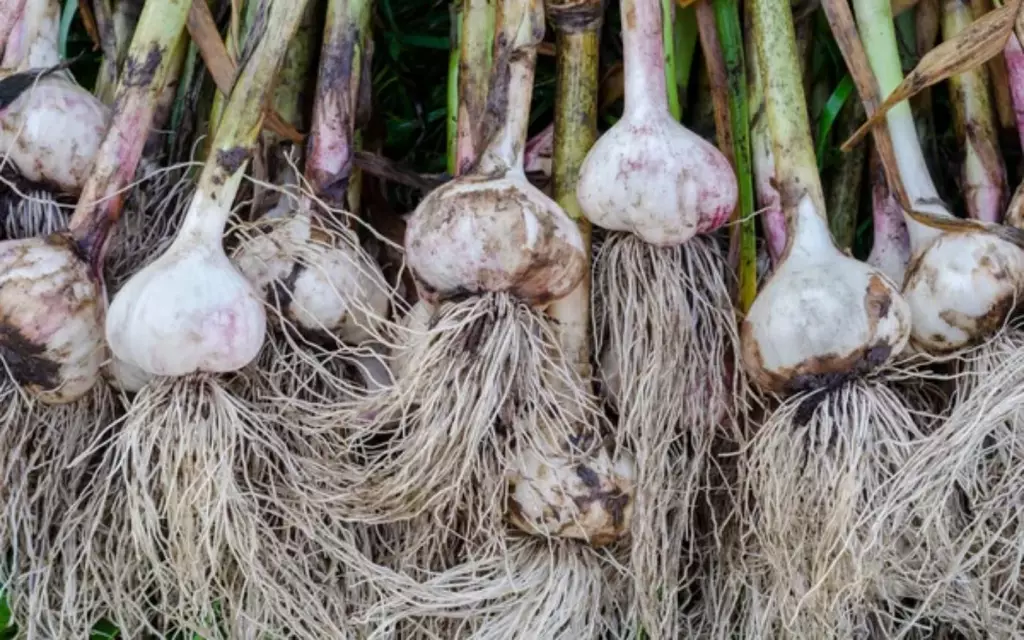
How to identify mature garlic plants
Your garlic is ready for harvest when you notice a few lower leaves turning brown, while the top leaves remain green.
With varieties like purple stripes, porcelains, and silverskins, look for distinct color changes and the drying of the garlic scapes if present.
Step-by-step guide to harvesting garlic
- Stop watering: A week before the expected harvest, stop watering to allow bulbs to firm up.
- Check the soil: Use a garden fork to gently loosen the soil around the bulbs, careful not to dig up the bulbs directly.
- Remove the bulbs: Pull the garlic stalks upwards; if resistance is felt, use the fork to further loosen the soil until you can lift out the bulb without causing damage.
Common mistakes to avoid during harvest
- Avoid damaging bulbs: Be gentle when using the garden fork to avoid damaged bulbs, which are prone to disease and decay.
- Don’t rush the process: Harvesting too early might result in smaller bulbs, while too late can lead to mold or fungus as the cloves can split and the bulb opens up.
- Proper handling: Handle the newly harvested bulbs with care to avoid bruising, which can also lead to quicker spoilage.
Do You Wash Garlic After Harvesting?
When you're dealing with freshly harvested garlic, it may be tempting to wash it right away. However, you need to resist the urge to wash the bulbs immediately after pulling them out of the ground.
Water can introduce moisture that might lead to rot, which is detrimental when you're trying to cure the garlic for storage.
Here’s what you should do instead:
- Gently remove the dirt: Brush off any loose soil from the bulbs carefully with your hands or a soft brush.
- Leave the roots: The roots help to absorb moisture from the bulbs, so do not trim them before curing.
Consider this:
| Do: | Don't Do: |
|---|---|
| Let the soil dry and brush off. | Wash the bulbs with water before curing. |
| Cure in a dry, ventilated area. | Leave bulbs in a damp or non-ventilated area. |
| Check for any damaged bulbs. | Cure damaged bulbs as they may rot and affect others. |
If you must clean your garlic before curing, ensure it's only to remove clumps of soil that won't come off with a gentle brush.
Remember that the outer layers of the bulb will be removed after curing, which will leave you with clean cloves ready for use or storage.
Post-Harvest Handling
After you've harvested your garlic, the two main steps to perform are cleaning the bulbs and sorting them before the curing process begins.
Cleaning and preparing garlic for curing
Once you've harvested your garlic, gently brush off any soil clinging to the bulbs. Be careful not to damage the protective skin. Now, you have the option to clean and trim the roots slightly, being careful not to cut into the cloves.
For long-term storage, leave the stalks on the bulbs, as this helps in the curing process. Bulbs can also be tied in bundles with twine or braided if you prefer a traditional method, which is aesthetically pleasing and functional for hanging.
Sorting garlic for quality
Inspect each bulb thoroughly and sort your garlic based on quality. Set aside any damaged bulbs to use first, as they won't store well.
Look for signs of disease or any soft spots. Reserve your healthiest bulbs for long-term storage and those with smaller cloves for early use or planting next season.
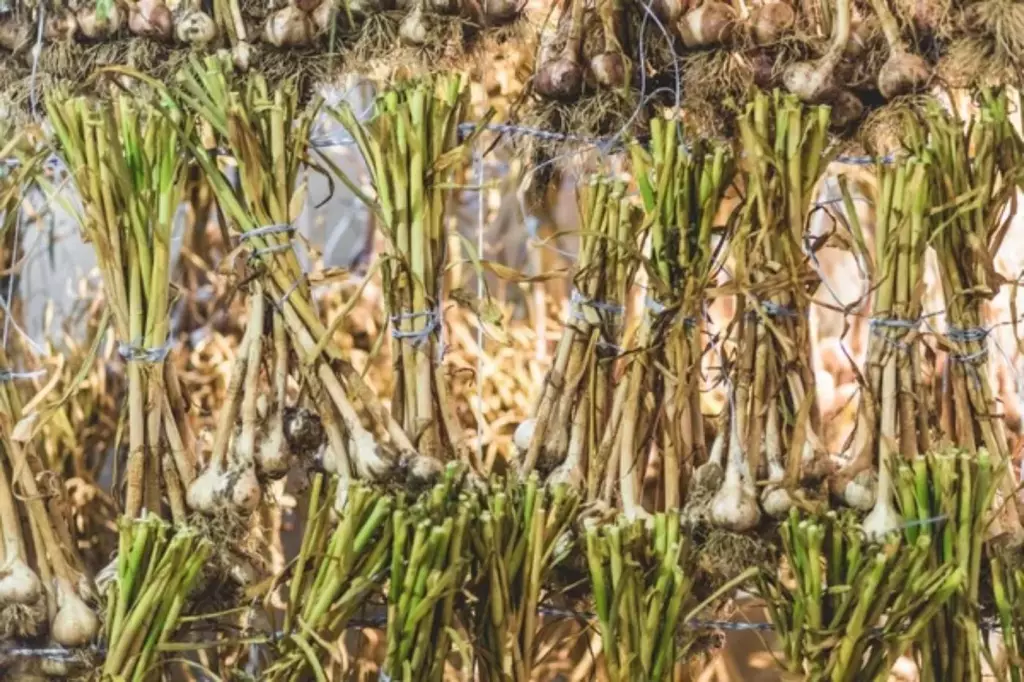
How to Cure Garlic After Harvest
After you've harvested your garlic, you need to cure it properly for good preservation. Curing is simply the process of drying garlic to prepare it for storage.
Step-by-step curing instructions
-
Step 1: Start by brushing off any soil from your garlic bulbs gently. Be careful not to damage the bulbs as bruises can affect their storage life.
-
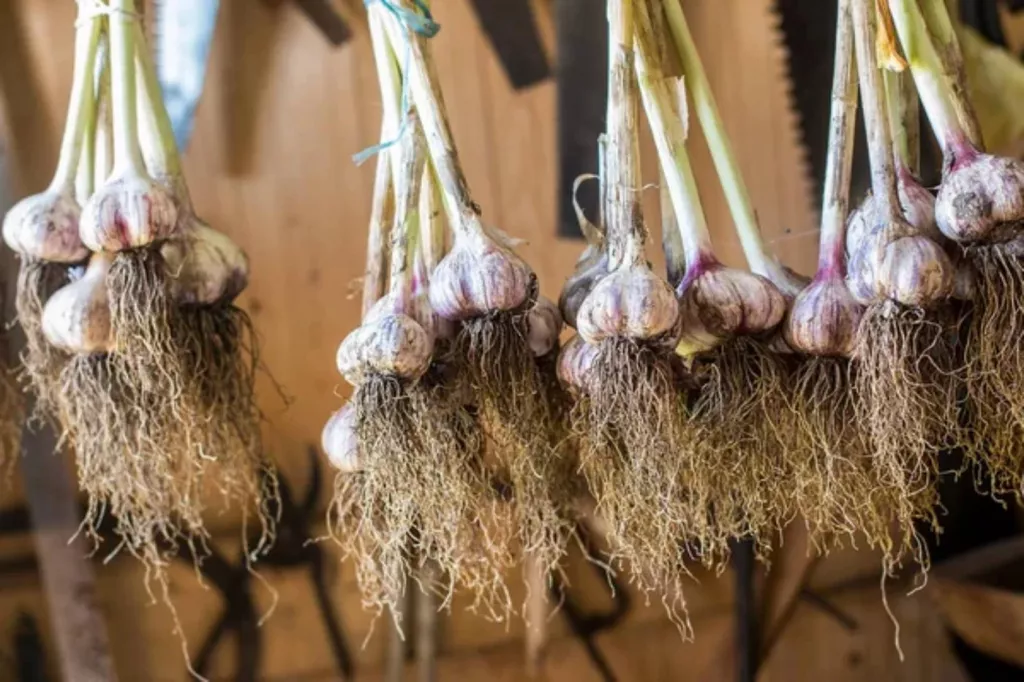
Step 2: Find a dry, well-ventilated area away from direct sunlight. You'll want to hang your garlic or lay it out on a rack. Ensuring proper airflow around each bulb is key during the curing process.
-
Step 3: Leave your garlic to cure in this spot for about two to four weeks. Check on the garlic periodically to make sure the area remains dry and free from pests or mold. The garlic skins should become papery, and the roots dry and wiry.
-
Step 4: Once the outer skins are dry and the roots have withered, you can trim the tops and roots off. Leave about an inch of the stem to help seal off the bulb.
Note: Protect the garlic from rain or damp conditions during curing.
Monitoring your garlic during curing
Check your garlic periodically for signs of mold or fungus, which could indicate too much moisture. If you find any cloves starting to decline, remove them promptly to prevent spread.
Store your cured garlic in a mesh bag or an airy container to protect against pests and diseases. Keep them in a cool, dry place until you're ready to use or plant them. The ideal temperature for curing garlic is between 80 to 85 degrees Fahrenheit.
Storing Cured Garlic
After you've properly cured your garlic, storing it correctly is key to ensuring it lasts. You’ll want to find a *cool, dry place that maintains a consistent room temperature. An area with good air circulation is ideal to prevent any moisture that could lead to mold.
For long-term storage:
- Keep the bulbs whole with their papery skin intact.
- Store your garlic in a mesh bag or basket to allow for airflow.
- Avoid plastic bags or containers which can retain moisture and cause rot.
When your garlic has sprouted, it’s still usable. Plant these cloves or use them soon, as the quality will decline. Sprouted garlic can have a sharper flavor, so taste test before adding it to your dishes.
Should you have excess garlic or prefer to have it ready for cooking, drying is a low-maintenance option. Make garlic powder by slicing cloves thinly and drying them at a low temperature in the oven before grinding.
Remember, for maximum size and flavor, store garlic in an environment with less than 65% humidity. Tracking the condition of your garlic cloves will help you use them at their best and avoid waste.
Your garlic should last for several months, providing you with a delicious and convenient staple right in your own kitchen.
How Long to Cure Garlic After Harvest
After you harvest your garlic, the curing process is vital for long-term storage. Curing is drying the garlic out to prevent rot and preserve its flavor. Here's a simple guide on how long to allow your garlic to cure:
- Duration: Generally, garlic should cure for a minimum of two weeks. Depending on the size of the bulbs and the humidity, it can take up to six weeks.
- Conditions: Cure your garlic in a well-ventilated area away from direct sunlight. Aim for a spot with consistent temperatures.
- Checking readiness: You'll know your garlic is cured when the skins are dry and papery, and the roots feel brittle. The neck should be tight and the stem hard when you squeeze it.
Should you clean garlic before curing?
When you harvest your garlic, you might notice soil clinging to the bulbs. Resist the urge to wash it off.
Wetting the garlic can introduce unwanted moisture that might promote rot during the curing process. However, a gentle brush to remove any excess dirt, without damaging the papery skins, is usually fine.
For the best results in curing garlic:
- Do: Gently brush off loose soil from the bulbs using your hands or a soft brush.
- Don't: Wash the bulbs with water.
- Consider: Trimming the roots to about 1/4 inch long, being careful not to cut into the bulb.
Any bruising might lead to decay over time. So, when you're done, find a dry, well-ventilated area for the next phase—curing the garlic.
Hang them up or lay them flat on a rack, ensuring that they do not touch each other for adequate airflow. After a few weeks, your garlic will be well-cured and ready for storage.
Is Fresh Garlic Stronger Than Cured Garlic?
When you harvest garlic straight from your garden, it's bursting with moisture, making the flavor quite bold and sometimes spicier. Fresh garlic has a sharper taste that can be more pronounced compared to its cured counterpart.
Curing garlic involves a drying process that concentrates the flavor. As it dries, some of the initial pungency fades away, leading to a milder and richer taste profile. The complexity of the flavor becomes more pronounced with curing.
| Feature | Fresh Garlic | Cured Garlic |
|---|---|---|
| Flavor | Sharper, more intense | Milder, richer |
| Texture | Juicier | Drier, firmer |
| Best use | Immediate | Long-term storage |
| Flavor profile | Bold, spicy | Complex, with reduced pungency |
| Taste intensity | More pronounced | Concentrated but less intense |
Your choice between using fresh or cured garlic can be influenced by whether you prefer a strong, immediate taste, or a subtler, deeper flavor in your dishes. Keep in mind that the potency of garlic, fresh or cured, can also vary with the variety of garlic you're growing.
Can You Use Uncured Garlic?
It's possible to use uncured garlic immediately after harvesting. Fresh garlic is edible and may offer a milder flavor compared to its cured counterpart. Uncured garlic has a higher moisture content, which can influence its texture and taste.
However, if you plan to store garlic, curing is essential. Curing garlic allows it to dry, which increases its shelf life. The process of curing involves simply letting it dry.
When using uncured garlic, note that it can spoil faster. Therefore, it's best advised to use it within a short period after harvesting or to cure it for longer storage.
Keep in mind that uncured garlic may not be as potent as cured garlic. The flavor and intensity of garlic increase as it cures and dries. As for preparation, you can use uncured garlic just like you would its cured counterpart in your cooking recipes.